


If your once sunlit area is now shaded, or a recent storm took out a significant tree, you may notice your garden design is suffering. It’s time for intervention.
It’s disappointing when a good design begins to fail. Unlike interior spaces, gardens continually change, so most designs require revision over time. Frequently, when a design begins to deteriorate, plants are replaced piecemeal. This often results in an unfavorable shift in appearance—technically, a loss of design “legibility.” What was once a dynamic tapestry begins to resemble a tattered patchwork.
Like most things in life, there is another way. However, hold off on a garden center run, and do your homework first. Restraining your impulses when you decide to change your garden composition is the unsexy but critical secret to successful design. Take these steps instead:
Step 1: Observe (observe, investigate, record, document)
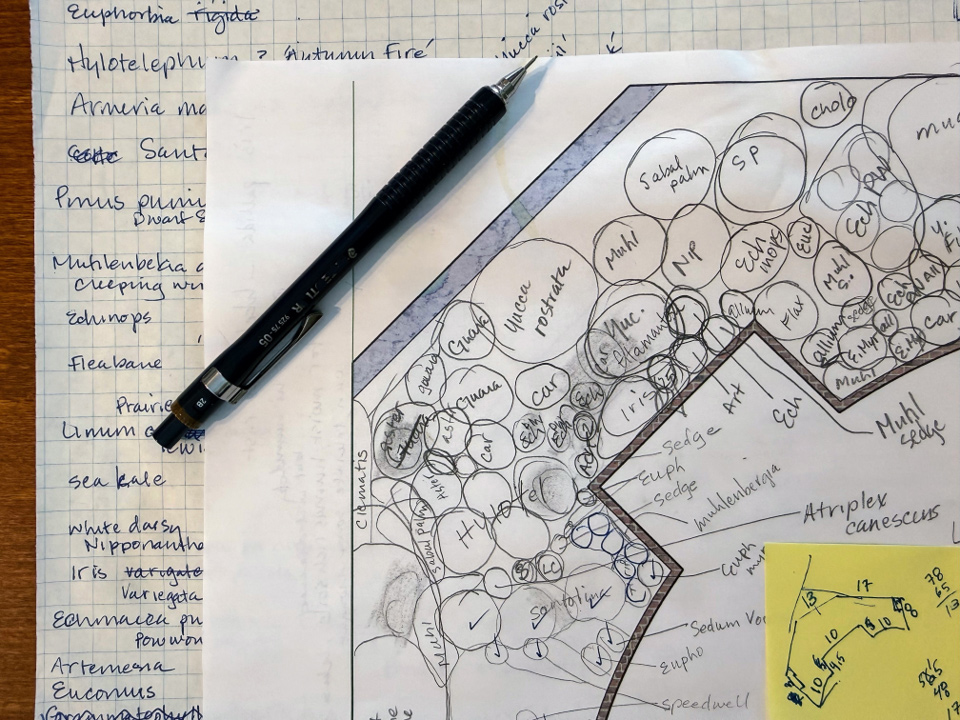
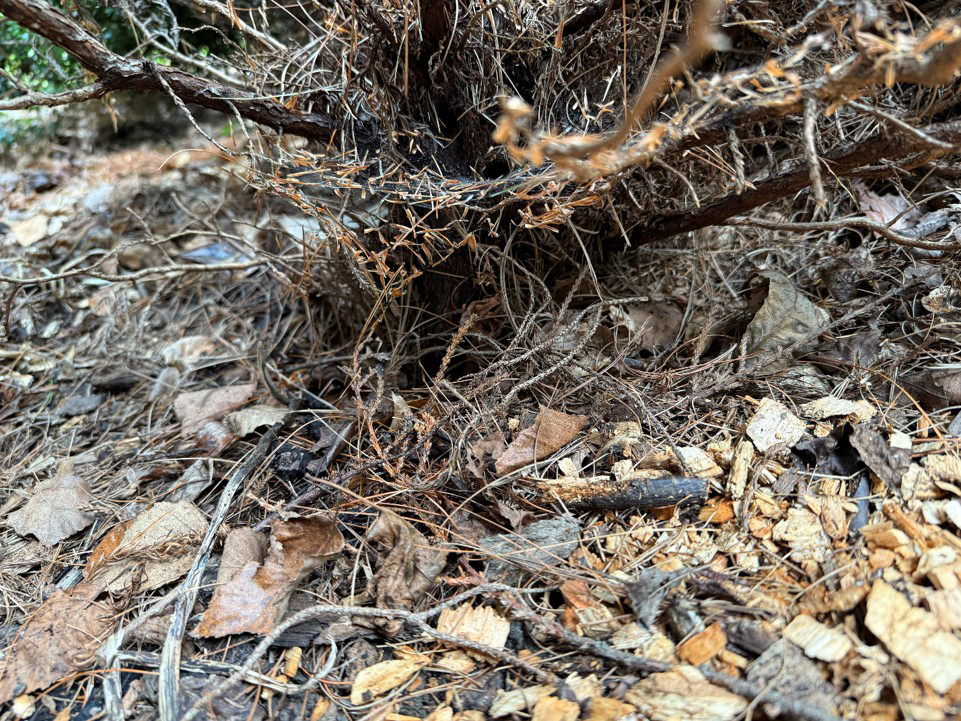
Observation goes beyond noticing problems; it’s also about recognizing what is working and investigating possible remediation. Record your findings by making a basic diagram of the bed. At this point, there is no need for artistic appeal or accurate scale, although using graph paper may help you keep track of everything. Draw a circle for each plant or group, label it in a way you will understand (you can find its scientific name later), and make a note of its condition and relevant variables. Document the site by taking pictures, more than you think you will need, and try to do this at three points throughout the day (morning/midday/afternoon).
Step 2: Assess (review, research, assess, prioritize)
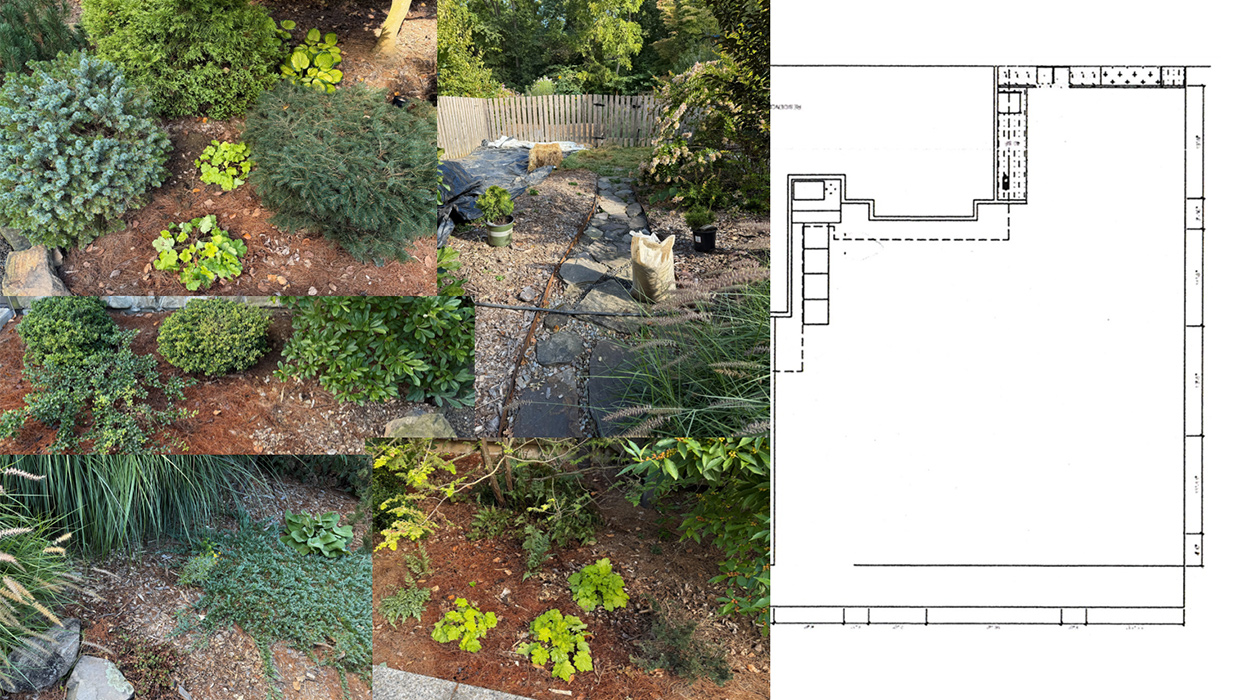
Lay everything out so you can review it. I upload my photos to create an online collage, but you can also print them. Depending on your site, you may already know the issues you are facing. Now is the time to note current environmental conditions and which plants will perform well under those conditions. Avoid fighting your circumstances, as that approach often leads to poor outcomes. Your revision’s success usually depends on your willingness to accept reality and think creatively. Believe me, there really is a plant for every place, but you may have to open yourself up to it.
If you have your heart set on specific plants, now is the time to research their requirements and compare them with your conditions. Review what you have at hand and wish to reuse, but be willing to start fresh. Consider more than your data; also assess what you are trying to accomplish with the revised design. For example, you may have initially designed that border to highlight a view. But as the neighborhood has grown, your needs have changed, and privacy is now more important. Prioritize your plant wish list to align with your design needs.
Step 3: Plan (rules, plan)
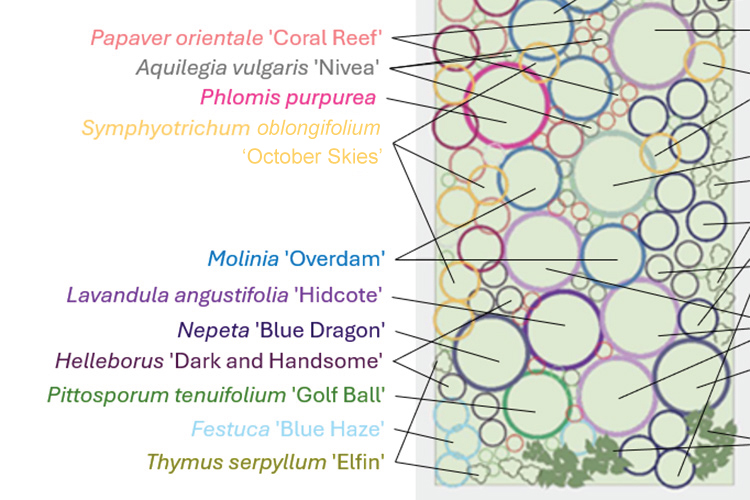
The instinct at this point is often to jump into layout, but wait—set some rules for yourself to filter your plant choices based on environmental conditions, your color scheme, and your design strategy. This is why it’s so important to know what you are trying to achieve with your redesign. It’s easy for plant palettes to go out of control now (more on this in another post), so generally focus on selecting fewer kinds of plants, but include more plants overall. Use the rules you set for this design when you finally make your layout plan.
While it doesn’t have to be complicated, using research, forethought, and a solid methodology results in the strongest designs. In Part 2, I’ll address the final two steps, focusing on installation and the factors that drive long-term garden success.
Find more great garden design advice:
Discuss this article or ask gardening questions with a regional gardening expert on the Gardening Answers forum.
And for more Northeast regional reports, click here.
Heather Tuckman owns Resilient Ground Design in southeastern Pennsylvania and is a graduate of the London College of Garden Design.
Photos: Heather Tuckman
Fine Gardening Recommended Products

Buffalo-Style Gardens: Create a Quirky, One-of-a-Kind Private Garden with Eye-Catching Designs
Fine Gardening receives a commission for items purchased through links on this site, including Amazon Associates and other affiliate advertising programs.
Buffalo-Style Gardens is a one-of-a-kind, offbeat garden design book that showcases the wildly inventive gardens and gardeners of Buffalo – and offers readers “the best of the best” ideas to use in their own small-space gardens.

Spear & Jackson 4930FZ Razorsharp Telescopic Tree Pruner
Fine Gardening receives a commission for items purchased through links on this site, including Amazon Associates and other affiliate advertising programs.
Telescopic tree pruner with SK5 carbon steel blade which stays sharper for longer. Variable length telescopic handle extends up to 92 Inch (2340mm). Lopper for cutting branches up to 1.2″ (30mm). 13 inch (330mm) saw is ideal for cutting thicker branches. Supplied with a long cord and pull-action handle. Part of the Razorsharp Advantage collection, the obvious choice for gardeners who demand and expect precise, powerful performance. “Grow Your Own” Great British Growing 2020 Award Winners.

The Regenerative Landscaper: Design and Build Landscapes That Repair the Environment
Fine Gardening receives a commission for items purchased through links on this site, including Amazon Associates and other affiliate advertising programs.
2024 Nautilus Award Gold Medal Winner! This awe-inspiring guide weaves together permaculture design, food resiliency, climate adaptation, community organizing, and indigenous wisdom that you can implement in your own backyard.