


Designing a Water-Wise Garden in Colorado’s Front Range
It isn’t easy gardening in Colorado’s Front Range. We get just 16 inches of annual precipitation, so it’s vital to have a water-wise garden with plants that can endure extended periods of dry weather in both summer and winter. At 5,200 feet above sea level, wide and sometimes very rapid fluctuations in air temperature wreak havoc on plant hardiness.
Sunshine is more intense at high elevations; plants that require full sun elsewhere in the country may not be able to survive without some shade here. Summer brings the risk of leaf-pummeling hail. But on the bright side, insects and diseases are usually not a problem, possibly because they can’t stand all of these harsh conditions.
You can understand why I hesitated to do very much with the landscape for the first 10 years after buying my house, and why designing and building the garden has been a gradual and ongoing process. But as it all began to take shape, I came to enjoy the challenge of helping plants reach their full potential in our semi-arid steppe climate. My garden will continue to evolve with each passing season, and I wouldn’t have it any other way. I’ve also learned some important lessons through the process of building a garden that conserves water but does not skimp on interest or impact.
Learn More: See the Plant Lists for These Water-Wise Garden Ideas
| GARDEN AT A GLANCE |
Where: Arvada, Colorado
Zone: 5b/6a
Size: Approximately 10,000 square feet
Age of the garden: 20 years
Challenges: Cold, dry winters and hot, arid summers; clay soil
When siting plants in a water-wise garden, keep the big picture in mind
If you’re starting with a blank-slate landscape, choosing and planting trees will always be a good place to begin. It pays to carefully research the cultural needs and mature sizes of the trees you will be working with. Don’t be tempted by species that aren’t suitable for your site, or that will require more water or maintenance than you can manage. I make it my goal to locate each tree in a spot where it can reach its full size unimpeded.
In front of the house, a mix of water-wise evergreen and deciduous trees were some of the earliest additions, sited with their future size in mind. Almost immediately, the trees provided structure and screening between the front door and the street, and their maturing canopies have created sheltered spots where I can experiment with some treasured shade plants that wouldn’t be able to make it in more exposed locations.
Take advantage of a slope
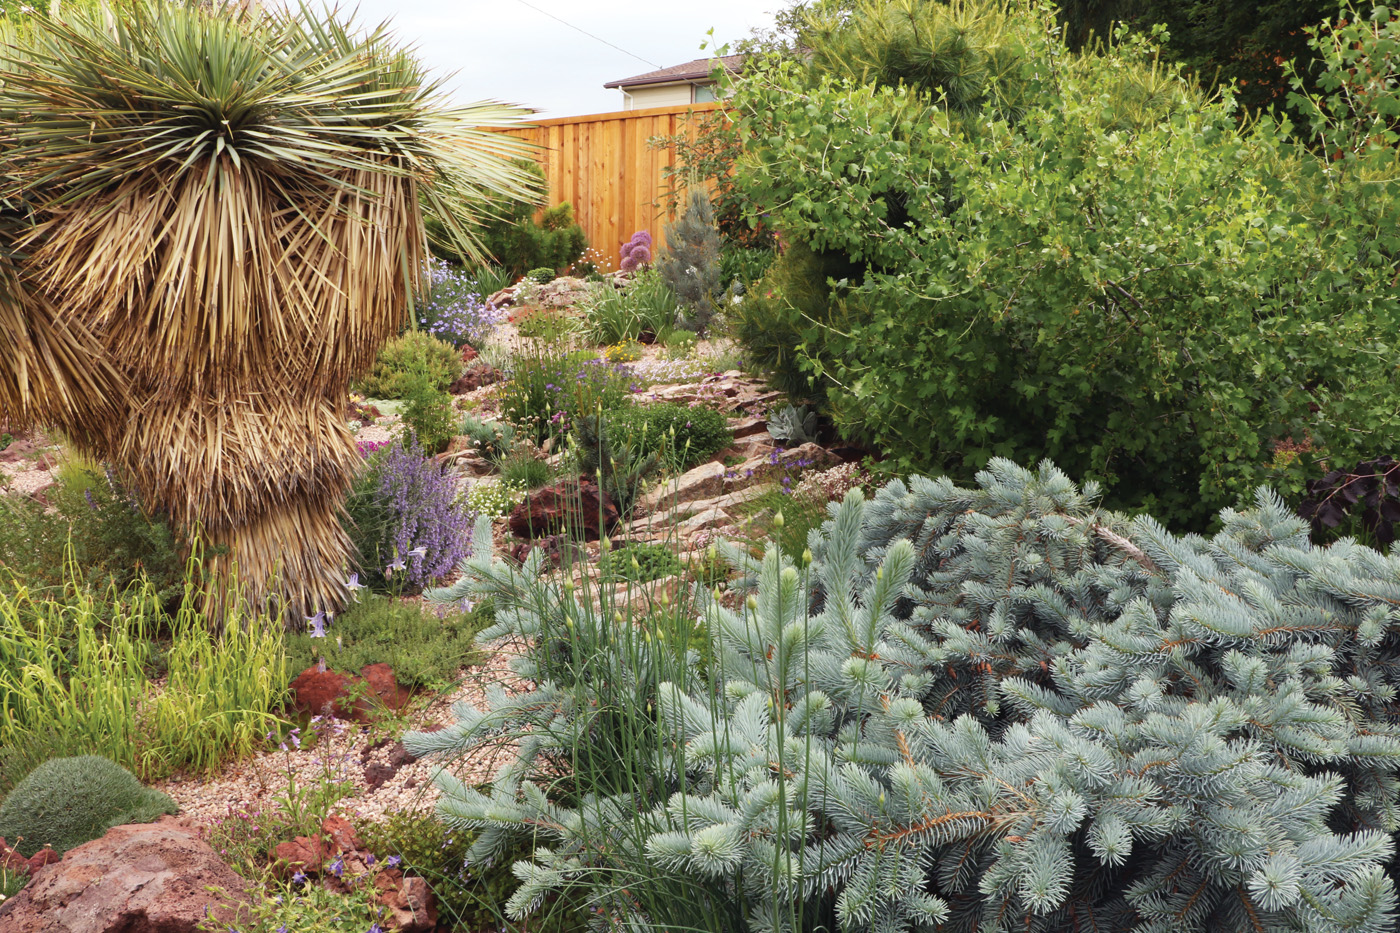
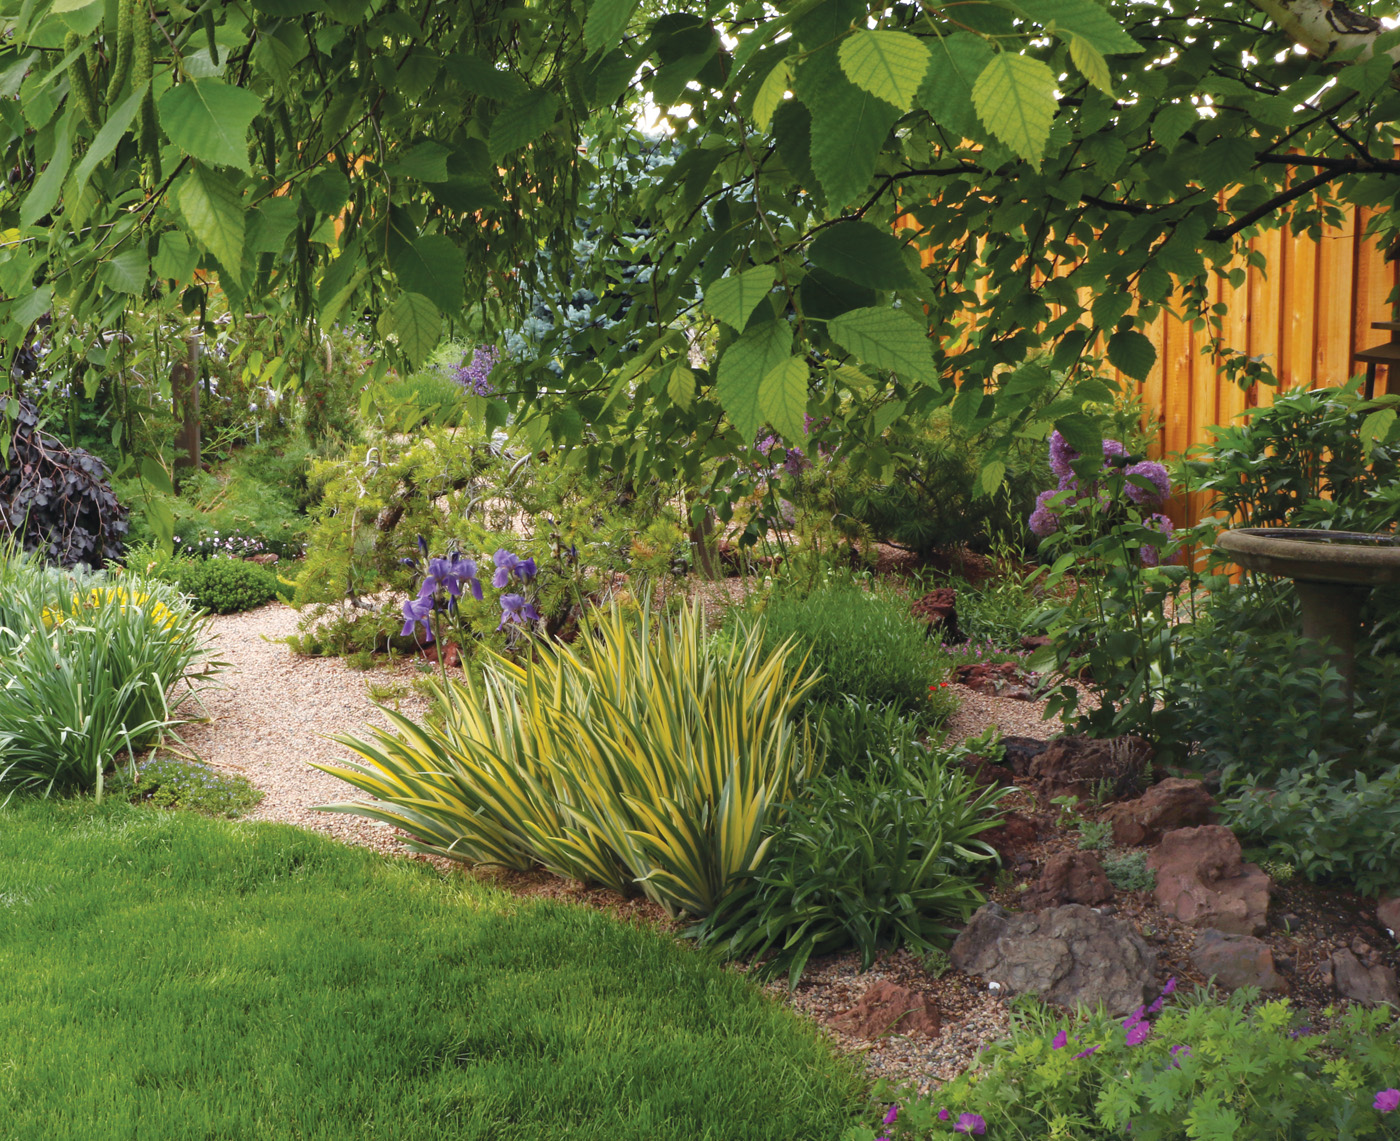
Behind the house is a sloped hillside, which at first seemed like wasted space where it was impossible to keep the lawn happy. But once I started building planting beds in the spots that were hardest to mow, it became evident that a sloping garden is actually ideal for displaying plants (photo above). In the future, I don’t think I would consider buying a home on a flat lot.
Listen to Our Podcast: Let’s Argue About Plants!
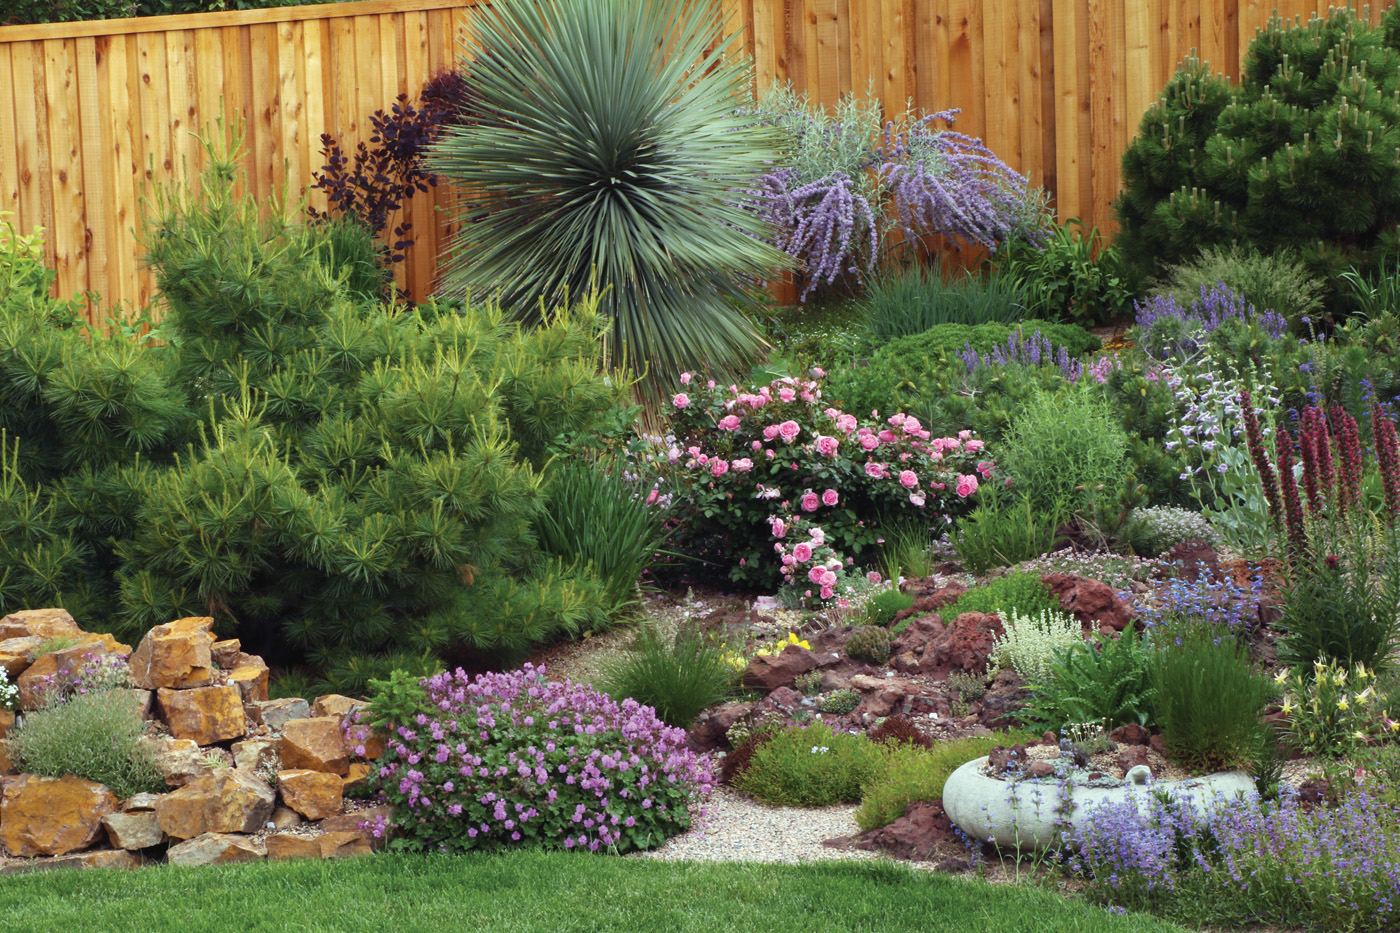
On the slope, I made a concerted effort to keep taller trees and shrubs toward the perimeter, leaving sight lines open from the deck and house into the garden. Smaller plants are massed together in traditional mixed beds and rock gardens, balancing the visual weight of larger focal-point plants.
Dwarf conifers are scattered throughout the garden where they provide fantastic four-season interest and are impressively drought tolerant once established. I look for slower-growing cultivars like ‘St. Mary’s Broom’ blue spruce (Picea pungens ‘St. Mary’s Broom’, Zones 2–7, center left in the above photo). It is well worth the effort to seek out conifers with a variety of habits, being mindful not to include too many round evergreen balls or tall, narrow columns.
See the full plant lists for this water-wise garden design here

| GOOD TO KNOW |
Make water conservation part of your everyday routine
Keeping water use to a minimum has become increasingly important to gardeners everywhere. If a stunning water-wise garden is possible in the arid West, it can be done where you are, too. Here are a few ideas to get started:
- Seek out regional natives.
Upland species adapted to your local climate should be able to survive without supplemental water once established. - Avoid watering during the hottest hours of the day.
Early morning is best. If you use an irrigation system, make sure it is set up properly. Turn off automatic systems after it rains, and avoid using sprinklers that spray water high into the air, as this leads to increased evaporation. - Add mulch to conserve soil moisture.
Both wood and gravel mulch will conserve soil moisture and suppress weeds. Apply a layer that is 2 inches deep at most. Gravel that is too deep can make it harder to get new plants established, and an overly thick layer of wood mulch could lead to increased disease issues. - Reduce or eliminate lawn areas.
Consider converting remaining lawn to drought-tolerant varieties like Dog Tuff™ grass (Cynodon ‘PWIN04S’, Zones 5–10).

Consider the benefits of open space
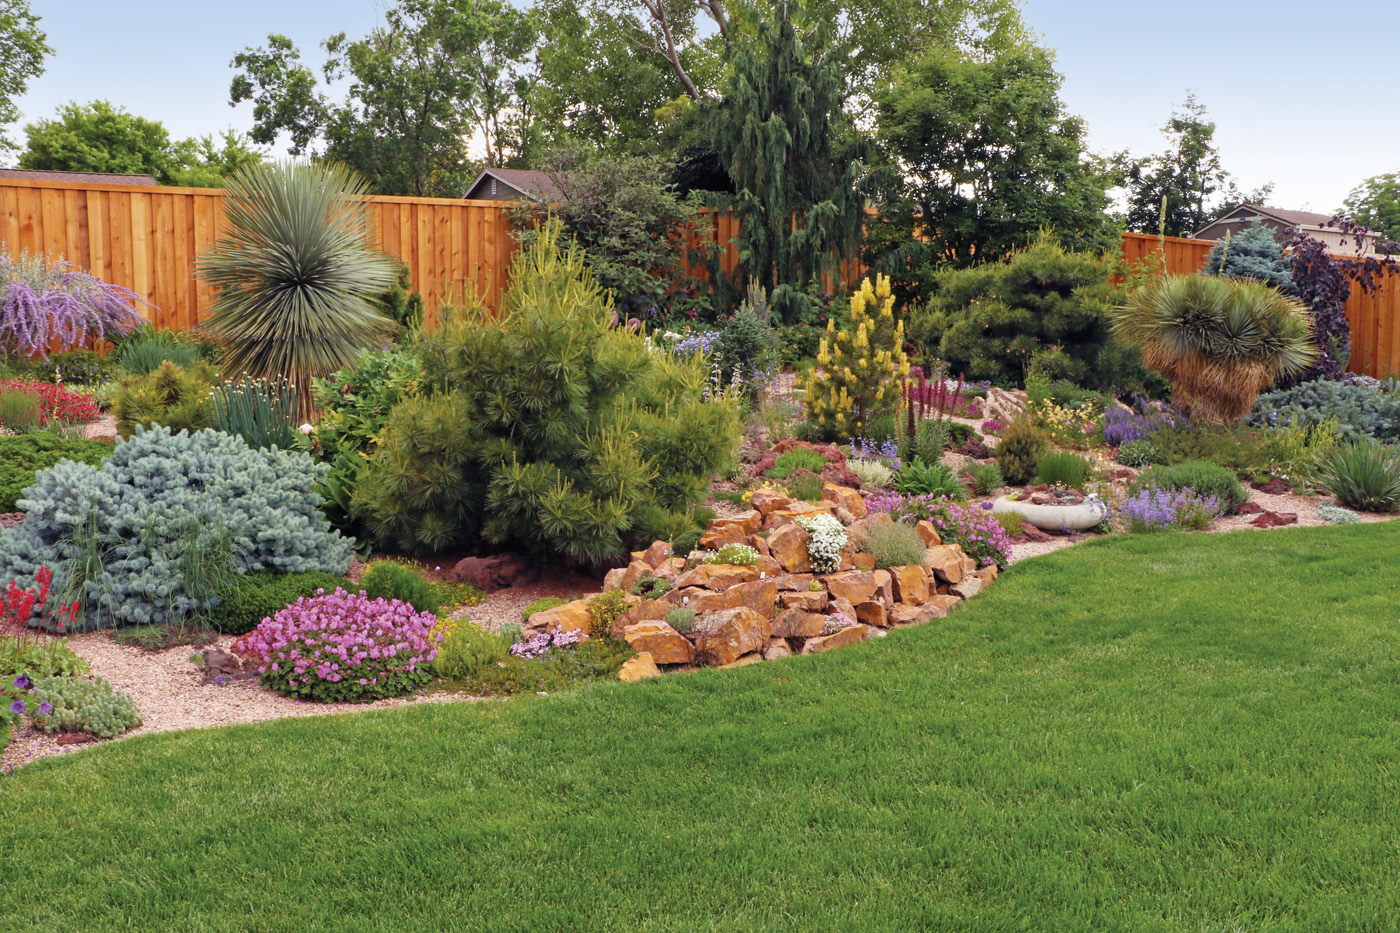
I have intentionally kept the flat part of the backyard as a typical turf lawn (below), which serves as a nice transition from the deck to the back garden. It is about 20 feet deep and 60 feet wide, enough space for kids and dogs to play but small enough that I don’t complain too much about mowing.
In the sloped garden area, pea gravel pathways wind through the plantings, defining different areas and allowing access for maintenance and garden meandering. I like to keep shorter plantings close to the edges of pathways, with plants gradually increasing in stature moving inward toward the middle of the bed.
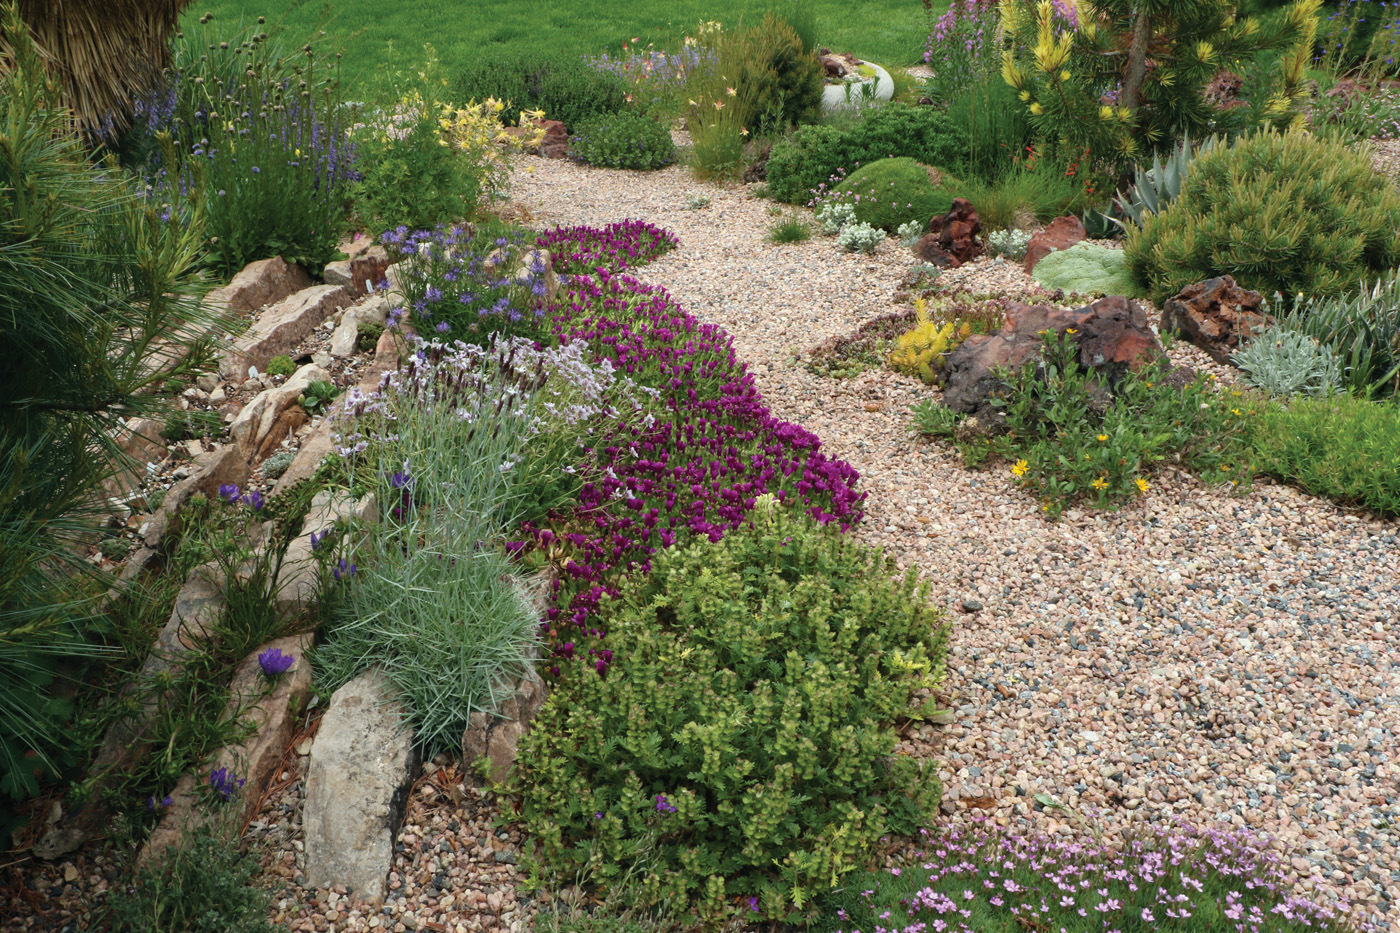
Mulch to conserve water
A layer of pea gravel roughly 1 inch deep is a resource-efficient way to keep weeds down and retain moisture in a low-water garden, and gravel doesn’t break down like typical wood mulch. I have never installed an irrigation system and have found that watering selectively by hand promotes water conservation. Rather than watering the entire area where a new plant was put in, I just water the plant. Weeding is done in early spring when small seedlings are first emerging, and likely won’t be necessary the rest of the year.
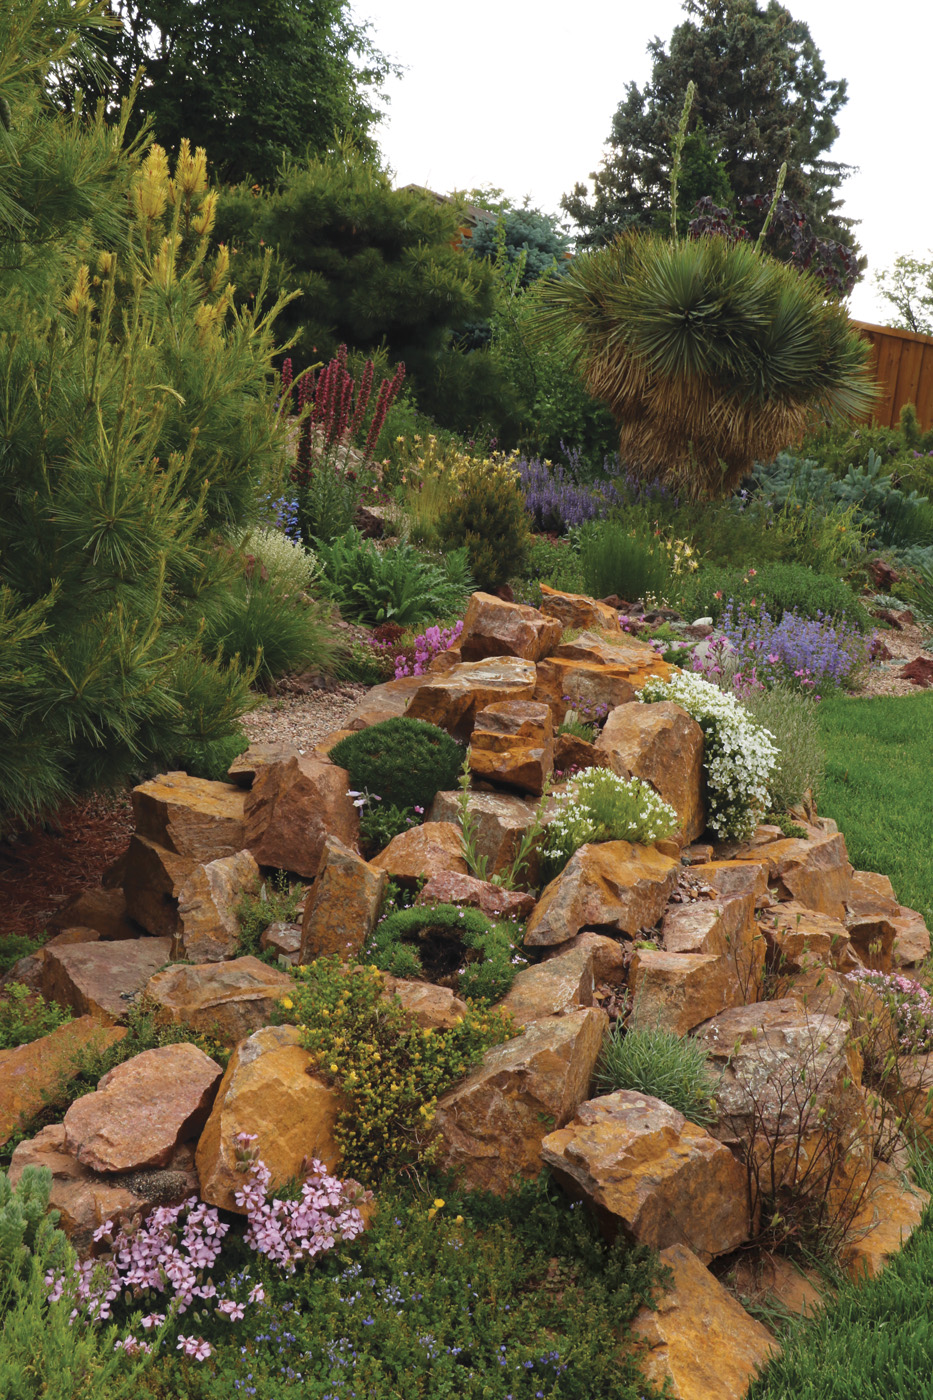
I have a passion for alpine plants, many of which are evergreen and provide excellent appeal all year. But alpines are generally small in stature and easily overwhelmed by surrounding plants. My solution is to allot ample space to grow large groups of these diminutive plants together in purpose-built beds that balance out the visual impact of larger trees, shrubs, and masses of perennials (photos below).
Rock and crevice gardens are focal points with tons of problem-solving potential
For years, I tried and mostly failed to grow alpine plants in the existing heavy clay soil, amended to a depth of about 8 inches. My success with alpine species improved dramatically when I started building rock and crevice gardens backfilled with a specialized soil mix. Some of these gardens are built on top of the existing soil, while others are kept lower. In the case of one crevice garden (above) I removed about 18 inches of soil, backfilling as the stones were set so their tops sit nearly flush with the surrounding grade.
Rock and crevice gardens offer great opportunities to create specific microclimates to suit the needs of particular plants. For example, one of my largest installations, constructed with Wyoming volcanic rock, is planted principally with xeric plants like ‘Electric Blue’ foothill penstemon (Penstemon heterophyllus ‘Electric Blue’, Zones 5–9). But I’ve also discovered that marginally hardy South African succulents do quite well when tucked up against a rock where they get sunshine and a little extra radiant heat throughout the year.
Learn More: How to Build a Crevice Garden
Add a rock garden
For a perpetually wet spot with especially terrible soil at the foot of the slope, I built a raised rock garden with very little soil incorporated. What was once a problem area where nothing would grow is now a focal point spotlighting some spectacular, hard-to-find species.
A gifted collection of plants that needed both shade and well-drained soil was the impetus for building a raised rock garden in the shade of a paper birch (Betula papyrifera, Zones 2–6, photo above). Now a group of fascinating new plants have a perfectly suited place to call home, and I’ve incorporated some wildlife-friendly features to make this shady retreat from the Denver sun even more inviting.
Whatever the challenges of your local climate and site may be, finding the right plants for a low-maintenance, water-wise design is a satisfying challenge. I hope that you can find a way to make your small corner of the earth a little more sustainable.
| TIP |
Create a Custom Soil Mix for Rock Gardens
When building a new rock or crevice garden, backfilling the planting pockets with the right growing medium ensures impeccable drainage, no matter how unsuitable the underlying soil may be.
The standard mix for the rock gardens seen above is roughly 2 parts topsoil, 1 part sand, and 1 part squeegee (tiny, rounded stones slightly larger than sand but finer than standard pea gravel). This formula can easily be tweaked and amended to perfectly suit the plants that will grow in it.
Michael Barbour is a horticulturist and plant propagator based in Denver’s western suburbs.
Fine Gardening Recommended Products
Spear & Jackson 4930FZ Razorsharp Telescopic Tree Pruner
Fine Gardening receives a commission for items purchased through links on this site, including Amazon Associates and other affiliate advertising programs.
Telescopic tree pruner with SK5 carbon steel blade which stays sharper for longer. Variable length telescopic handle extends up to 92 Inch (2340mm). Lopper for cutting branches up to 1.2″ (30mm). 13 inch (330mm) saw is ideal for cutting thicker branches. Supplied with a long cord and pull-action handle. Part of the Razorsharp Advantage collection, the obvious choice for gardeners who demand and expect precise, powerful performance. “Grow Your Own” Great British Growing 2020 Award Winners.
The Crevice Garden: How to make the perfect home for plants from rocky places
Fine Gardening receives a commission for items purchased through links on this site, including Amazon Associates and other affiliate advertising programs.
A crevice garden replicates the environmental conditions of mountain tops, deserts, coastlines, and other exposed or rocky places on earth. These striking garden features provide perfect conditions for the plants native to these far-off places, bringing the cultivation of these precious gems within everybody’s reach.

National Wildlife Federation®: Attracting Birds, Butterflies, and Other Backyard Wildlife, Expanded Second Edition (Creative Homeowner) 17 Projects & Step-by-Step Instructions to Give Back to Nature
Fine Gardening receives a commission for items purchased through links on this site, including Amazon Associates and other affiliate advertising programs.
From the National Wildlife Federation, the largest U.S. nonprofit conservation organization, with 6 million members and 51 state and territorial affiliated organizations. 17 step-by-step projects that everyone can do together make getting your family back to nature easy, educational, and fun. Over 200 color photos of backyard wildlife habitats and the wide variety of creatures they attract, plus step-by-step photos and illustrations for family projects. Learn wildlife-friendly practices for gardening, landscape design, supplemental feeders, birdbaths, nesting places, and more. Learn how to attract backyard pollinators, from bees and butterflies to beetles, bats, and hummingbirds
Get your garden certified by the National Wildlife Federation’s Garden for Wildlife(TM) program by following the included certification application checklist.